
Many people will pay over $4,000 for a kilowatt of solar panels on their tiny home busses. I installed solar panels on my large 1989 skoolie for less than a thousand dollars. How? It’s more simple than you might think.
Here are the four steps I followed to install the solar panels for so dang cheap (and you can follow these steps too):
1) Find solar panels at a wholesale price.
320-watt kits may be as much as $2,000. (Many cost around $700.) However, I learned that you don’t have to pay that much.
Use a wholesaler of house solar panels instead. To find a wholesaler, I looked on KSL ads, which is like a western version of Craigslist. If you type “wholesale solar panels” into Google, you can find a lot of great deals as well.
I purchased three 320 W solar panels for $250 each. Some 320-watt panels are even less expensive than the ones I bought. Buying wholesale may require getting the elements of a kit together yourself, but it’s definitely worth it if you’re on a budget like me.
Get the rest of your solar kit together. An MPPT charge controller is necessary for your kit. You can find one on Amazon for relatively cheap. Mine cost about $100. Rather than purchasing a mounting box, it’s easy just to mount it yourself. That’s all you really need in your kit!
2) Buy the hardware to mount the panels.
Like I just said, it’s pretty easy just to mount the panels yourself. You will need some ¾ inch L-brackets and ¼ by ½ inch self-tapping screws. Put three L-brackets on each end of the panel and screw them in to keep everything secure. It’s best to apply silicone to the bus before laying the brackets down. However, you can also apply silicone to the brackets after you lay them down. In total, the hardware should cost somewhere around $20-$30.
3) Wire the panels together.
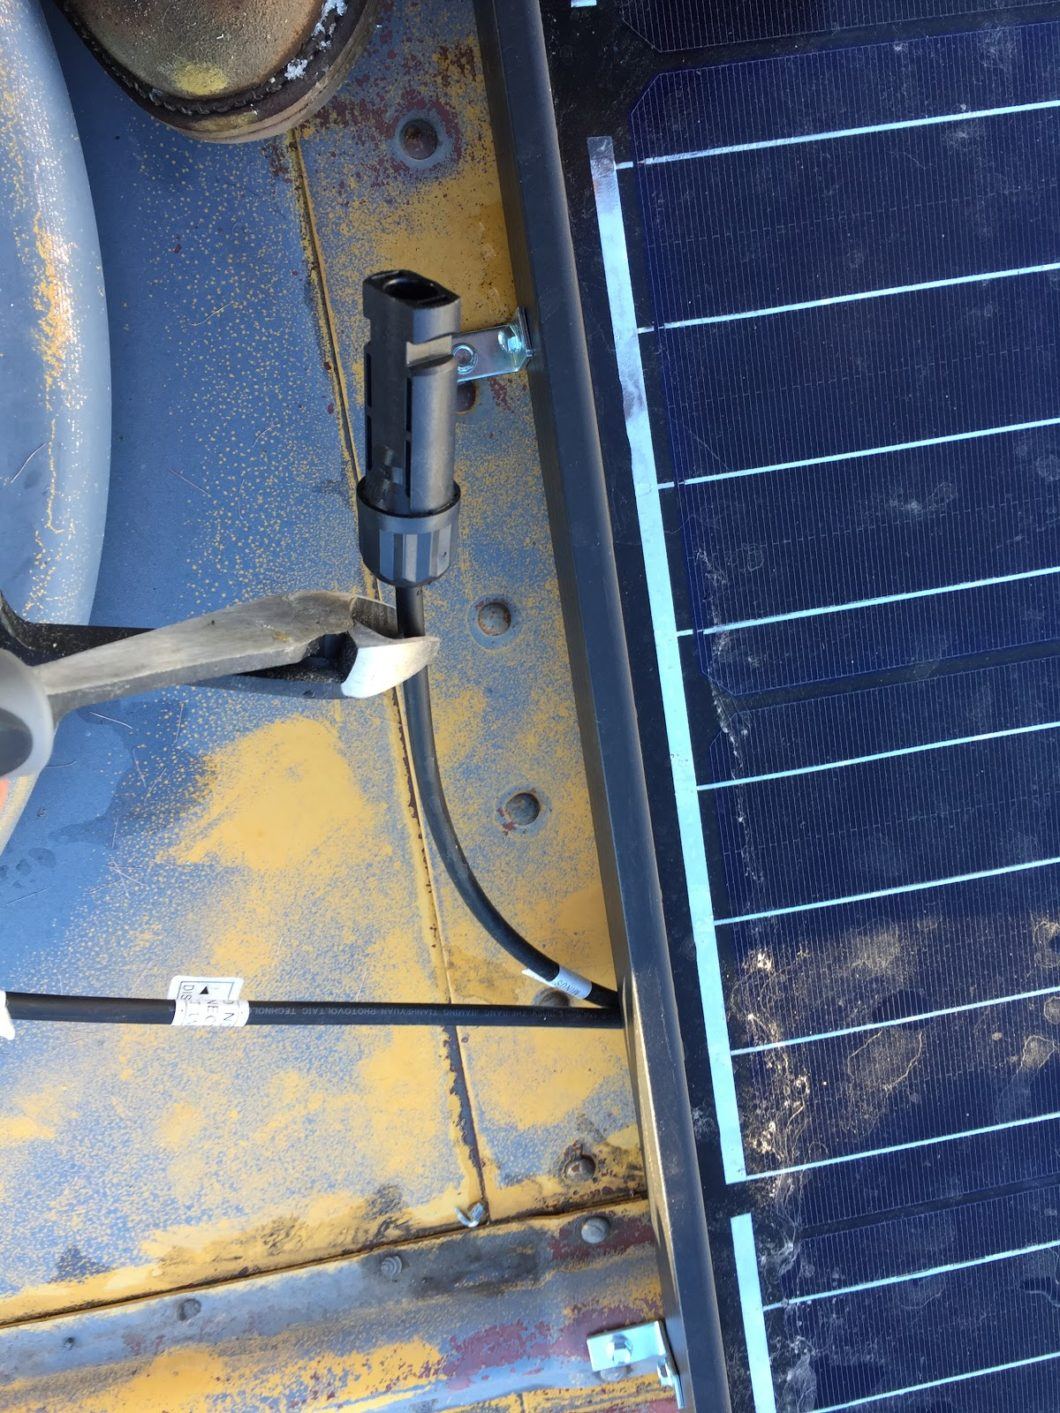
To do this, I wired my panels in parallel; this means I connected the positives to the positives and the negatives to the negatives. I used ten gauge wires and soldered them. I also used rubber grommets on the outside and inside of the bus to keep the wires from being cut by the metal from the bus.
However, looking back on it, I would not recommend my method of wiring because it doesn’t look as attractive, and it requires some effort. If I could do it again, I would use Y branch solar connectors to connect the three panels in parallel. These cost about $25 total. They are easy to hook up to the panels, you can remove them. They also look very professional. Additionally, I would use a double cable entry gland instead of rubber grommets. The double cable entry gland costs about $10, and you just need one. For safety purposes, you will want to include a 50 amp fuse for around $5-$15. You will hook this to the positive wire in between the solar panels and the charge controller.
4) Get a helper if you can!
I installed my panels about nine months ago, and my wife was really pregnant! Because we wanted our cute baby in our life, we didn’t want to risk her helping lift the panels and such. I needed a helper because even though I’m strong–I’m not that strong. I couldn’t raise those heavy panels up unto the roof myself.
You may also find that it is difficult to install these panels on your own, so find someone willing to help–a spouse, significant other, friend, family member. Your friend doesn’t have to be an expert to install panels. It’s pretty simple!
You might consider bribing them by offering to help them with their own project or by providing in another capacity. Really, that’s just the kind thing to do.
See? Solar is achievable at a reasonable price. Our solar panels gave us enough electricity to be off-grid during the day. With deep cycle batteries, yours will last through the night as well.
Don’t forget to get a battery and an inverter for your solar panels. I didn’t include batteries or the inverter in the cost because it varies greatly depending on how much power you want at night.
My wife and I were glad to save the money and have the panels. Hope this helps! Let me know in the comments if you try to do solar for cheap or other ways you’ve seen solar done at an affordable price.
I think this is a brilliant idea to get the solar panels installed on the roof of the tiny houses, since power requirement are lower, cheap options would serve well and also excess power can be sold to the national grid.
Ron, thanks! I am so glad you found my ideas to be brilliant. I hope if you pursue solar in the future (or if you already have) you will find cheap, affordable ways to do so.
So I have 12 panels, 18V, 165w each. I have a combiner box with 6 pairs of inputs on it. I have a 60A mppt controller and a 60A pwm controller (the latter came with the panels. The other I bought for something else). I have a 24V bank of 8 6V batteries in s-p. How to I wire this to charge the 24v bank?
Is there any chance you can hit me with the name of the company you bought those panels from? I just bought myself an ’02 International, and I’m thinking overkill on my solar system is the way to go, because you just never know what will come up!
Looking to install solar- would love to have you talk with my husband more about your installation. Already have solar panels, looking to make sure we put everything together incorrect relay. Look forward to hearing from you.
Thanks,
Lesslye
Hi Ron – May you advise the batteries that you used for your solar panels?
Thanks very much for this article. I greatly appreciate the effort.
Could you list links where to each item you included in the system you are focusing on for this article. It is really helpful to see exactly what goes with what at a bare minimum. So what exact controller you have and where to get that exact model so those of us who have no idea can replicate your successful and budget minded system.
* Three 320 W solar panels (Are all 320 W solar panels the same or can you point me to the exact model you have?)
* MPPT charge controller (Which one on Amazon exactly, so I get the right one for the three 320 Watt panels.)
* What cables
* What battery model? Where to get it?
Many thanks!
Unrivaled Solar’s high-quality solar panels are built with the best materials and craftsmanship, which is why they are backed by a 25-year manufacturer warranty. Each of these unrivaled panels is made from tempered glass and monocrystalline cells that generate up to 360-watts of electricity every hour that they receive sunlight. Whether you want to save money on your utility bills or contribute to a cleaner environment, these solar panels can help you do it all.