
Refrigeration in a tiny floating home is an essential part of our systems. Most liveaboard boats are equipped with refrigeration, though some are not. Some people simply store food with a cooler packed with ice. Where I like to travel, ice doesn’t last long so it was an easy decision to place value in outfitting the boat with an efficient refrigerator and freezer. 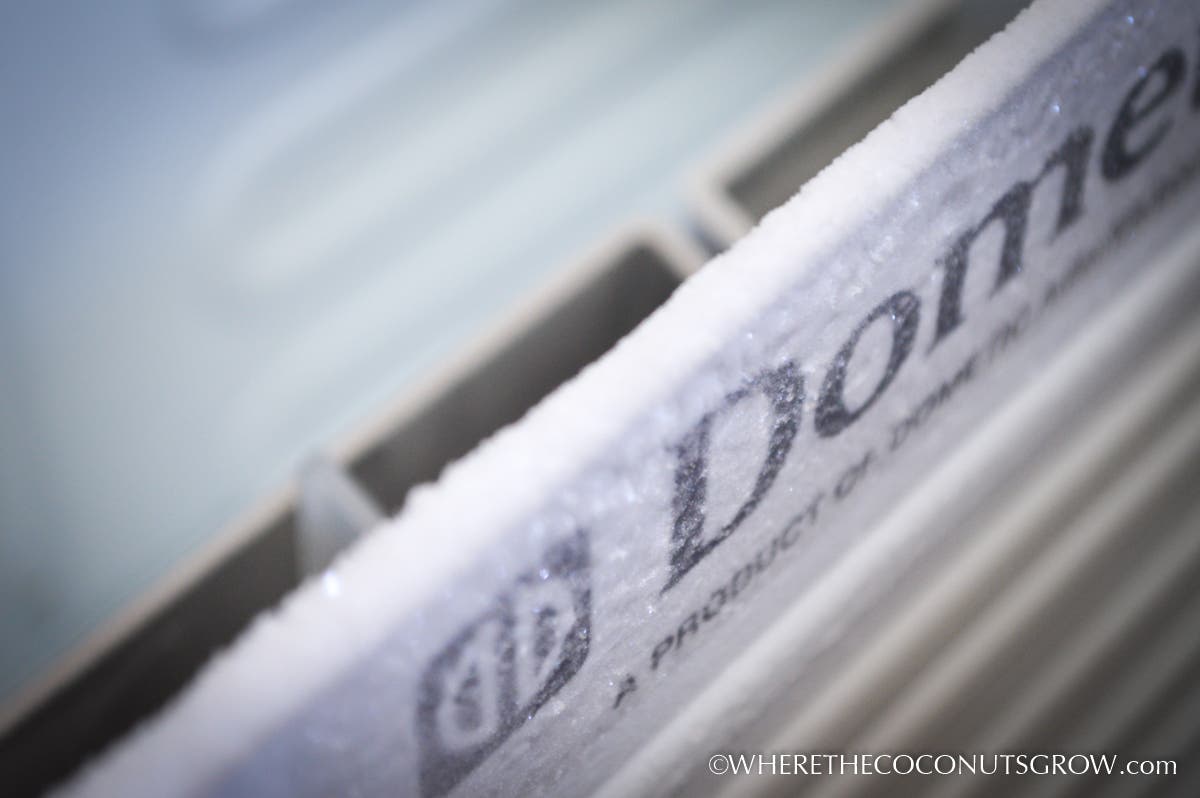
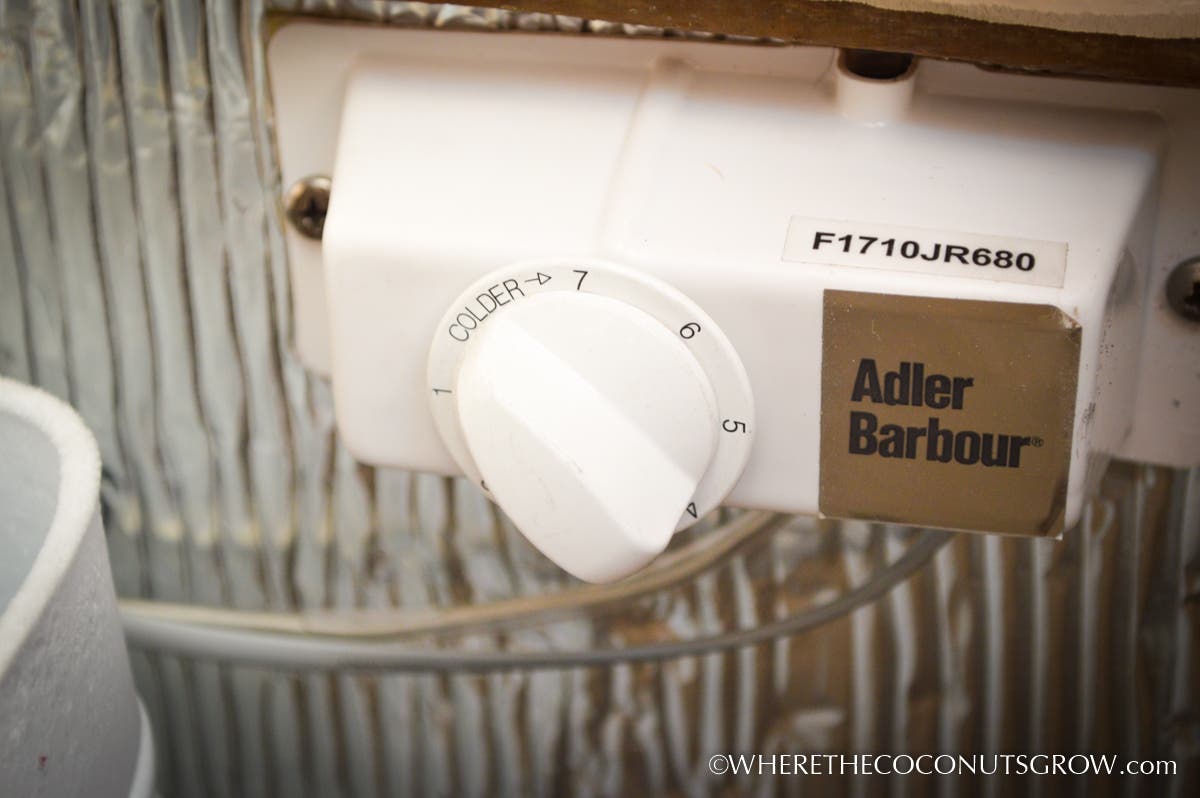
The refrigerator currently on board was installed on the boat before we bought her. It’s an Adler/Barbour Dometic air-cooled CU-100 ColdMachine consisting of a large vertical evaporator and an air-cooled condenser unit. The dial can be set from 1 to 7 though we only need to leave it at 3 1/2 in order to keep the inside of the evaporator at freezing temps. This is perfect for keeping the rest of the insulated box a nice cool temperature resembling what a normal household refrigerator would be.
After a short time using this unit, we decided we loved it so much that we opted to install the same unit in the soon-to-be freezer compartment just a few inches away.
Installing a separate freezer unit allows us to either set the dial for normal refrigeration and freezer space, or we can just crank the dial to freeze the whole thing and use it as one big freezer. It’s a good thing because whenever we go on a long passage between islands, Peter catches enough fish to fill the entire freezer space.
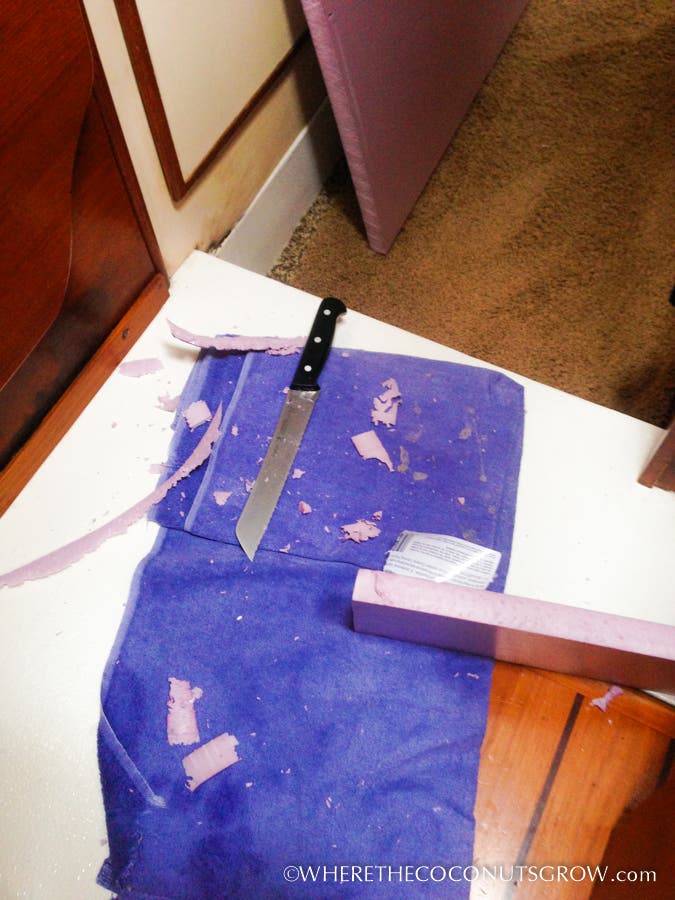
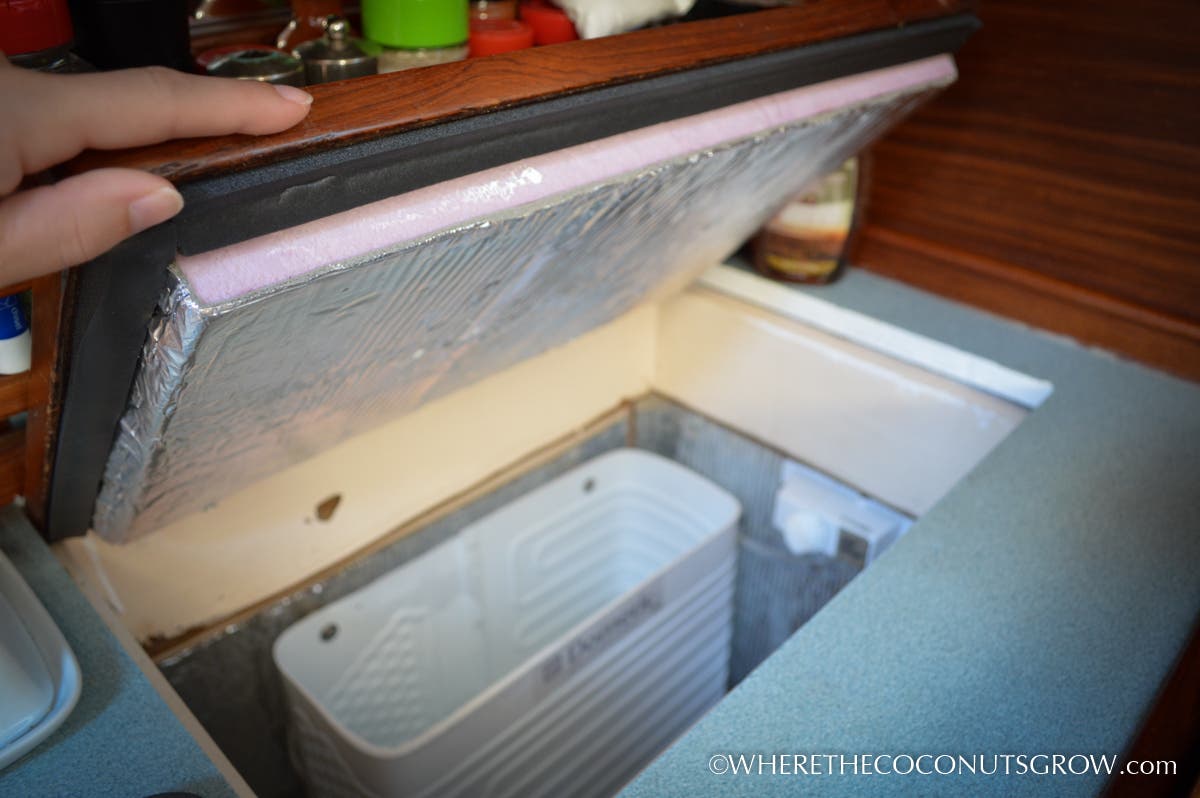
To start on the install, we had to find proper insulation. After finding what we wanted, we marked up the purple rigid insulation foam and prepared to custom cut it down to size. It was only available in gigantic sheets, or cute little 2×2 squares of the purple stuff. We got two of the squares instead of wasting the rest of a large sheet. A bread knife worked well enough to slice through the foam though it wasn’t exactly easy. It made a huge mess too.
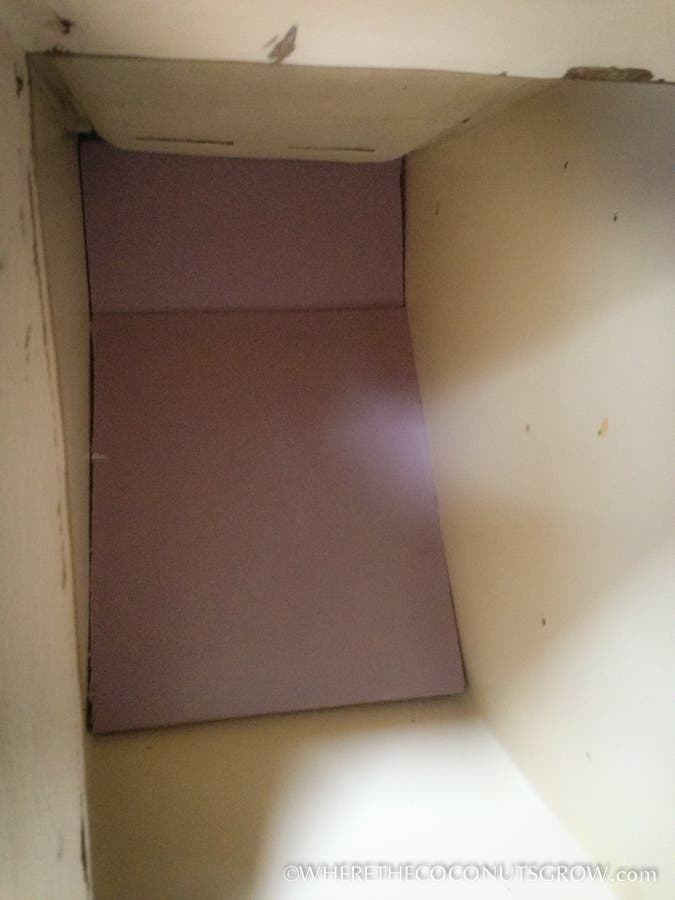
Piece by piece the odd-shaped walls of our freezer compartment started coming to life. It wasn’t too critical to get an exactly flush cut, but Peter got it close enough.
We also bought a roll of Self-Stick Foam/Foil Duct Insulation to apply over the rigid foam.

We thought the Great Stuff was a great idea, but didn’t end up using it for this project after all.
The walls of the space were already insulated and fiberglassed in but we wanted to just add a little bit more insurance by adding the foil duct insulation to prevent an unnecessary loss of cold air.
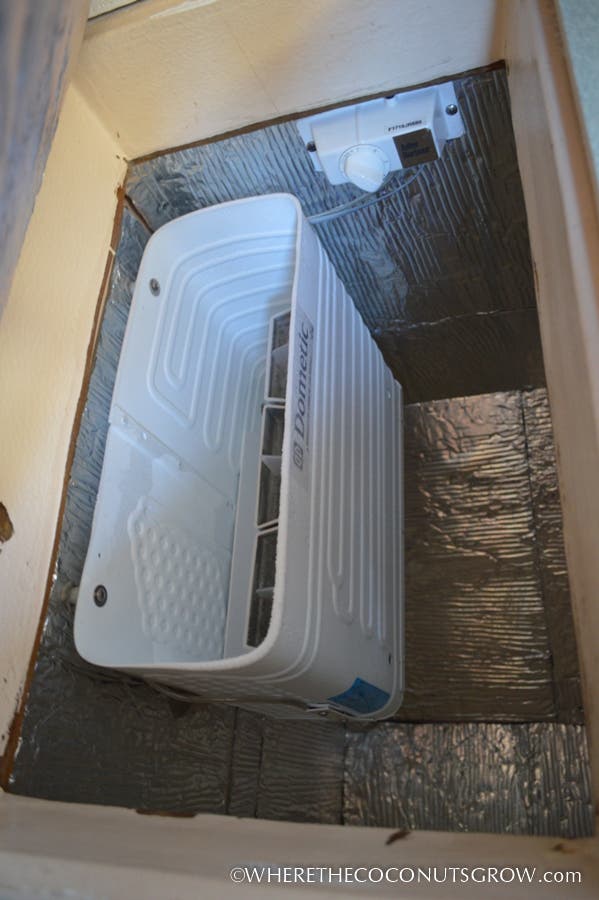
Unfortunately, the shape of this space is too tall and narrow, creating a challenge for circulation. Many moons ago, this space had a freezer unit installed but was later removed. There were metal racks screwed in holding plexi-glass shelving that had 1″ holes in them that we removed prior to the new installation. The holes in the shelving allowed the cold air to circulate all the way to the bottom of the narrow and vertical column. Without this special shelving, a circulating fan or a spillover kit, the food items on the top half of the space act as insulation preventing cold air from reaching the food on the bottom. The food on the bottom then cannot freeze.
With the new unit we installed, the old shelving would have to be completely redesigned. To escape this hassle, we decided we would just not fill the freezer to full capacity. To partition off the space we stuffed pillows inside black trash bags and placed them in the bottom half of the new freezer. The thermostat reads the temperature of the top half of the space, essentially cycling less to freeze less space.
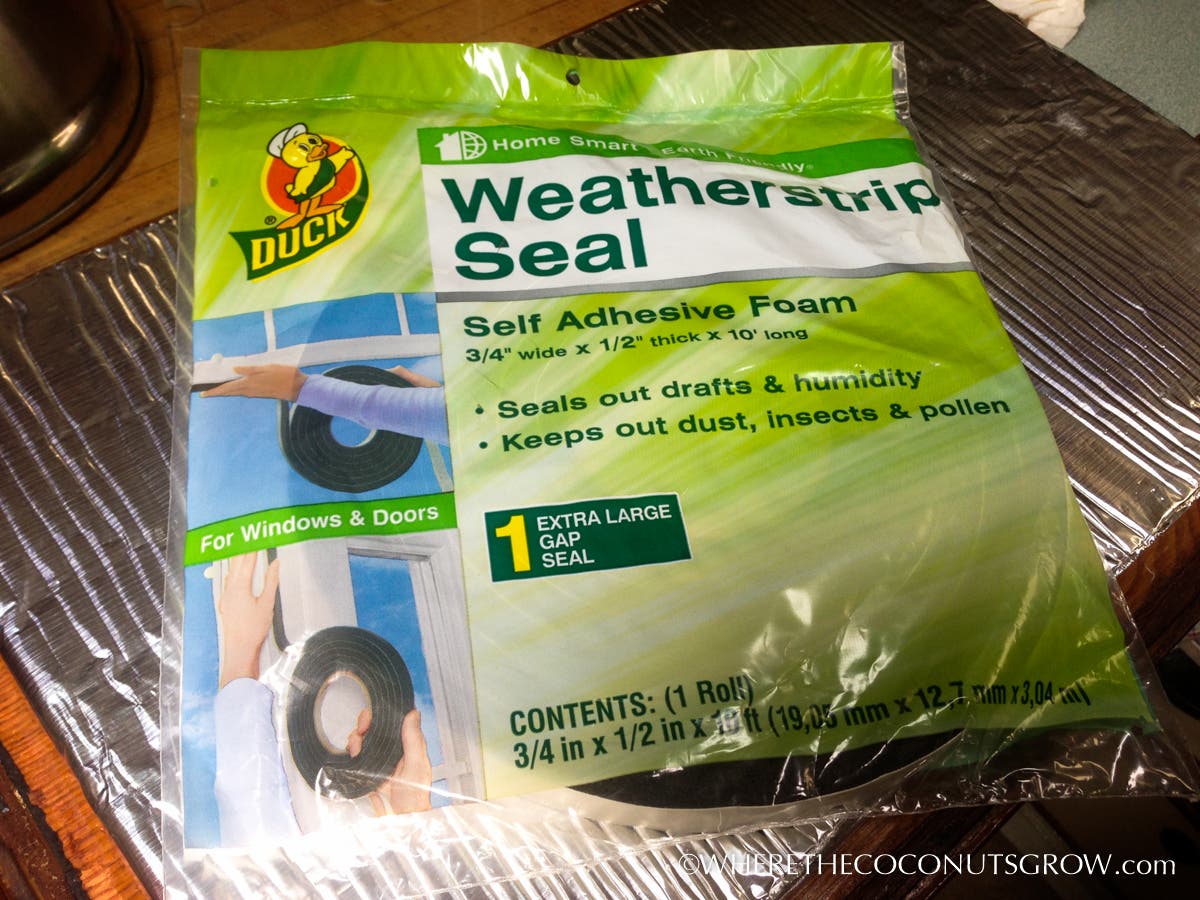
To ‘top it off’, a chunk of purple foam was attached to the lid with a layer of the foil insulation. The lid also needed a new weather-stripping seal around the edge so we took off the old and put on the new.
Here comes the ‘cool’ part!! We decided to limit the DIY part of this project to just the insulation. We hired a professional marine refrigeration guy to handle the install of the actual condenser unit and evaporator.
So we’ve been told, refrigeration is nothing to mess around with if you don’t know what you’re doing. The parts cost much less through a distributor: $1200 (compared to $1800 retail) We paid about $800 in labor so the whole project cost $2000. This is only $200 more than it would have cost us to do the whole thing ourselves and having it done right is totally worth 200 bucks. It was done way faster than we could have done it, and we know all the wiring and refrigerant is installed safely too.
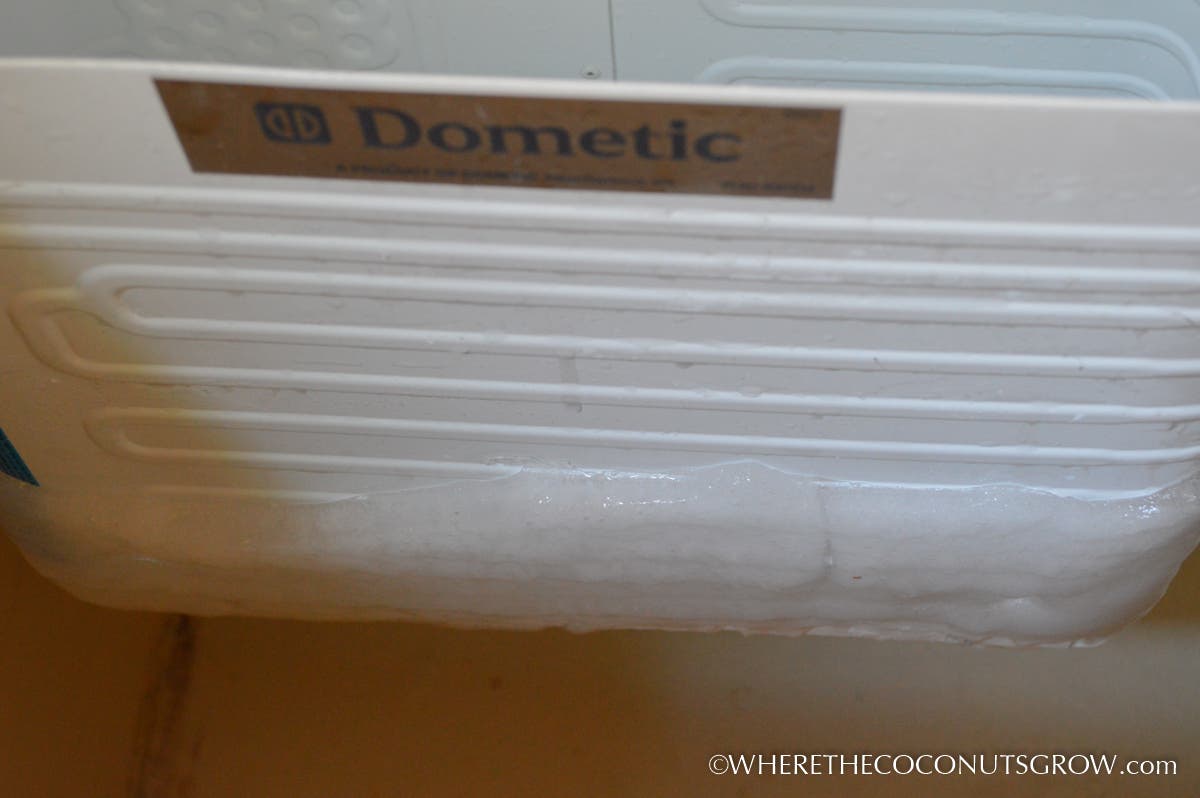
The condenser unit was installed in the engine room which was directly behind where the refrigerator and freezer are in the galley. Back on the other side… the evaporator box was mounted along with all the other components that go inside the freezer.
My favorite part of this whole deal?? I get THREE, yes THREE new aluminum Adler/Barbour vertical ice-cube trays!! These suckers are something like $80 a piece brand new!! They make awesome monster size ice cubes and last a long time. Every morning we soak one tray upside down inside a 52oz bubba keg filled 3/4 of the way with water. When the ice is melted a little, it will slide right out. We top off the rest with water and it lasts practically all day even in 90 degree weather.
The finished product: a dedicated freezer for all of Peter’s fish… and other provisioning of course 🙂
An important thing to know about 12-volt refrigeration is that a watchful eye must be kept on whether or not the unit needs to be defrosted. If more than a 1/4 inch of ice builds up on the cold plate, the ice begins to act as an insulator preventing heat from being removed from the area outside of the cold plate. The thermostat then tells the system to keep cycling more than it normally would, burning up all the energy we’ve just made with our solar panels and wind generator.
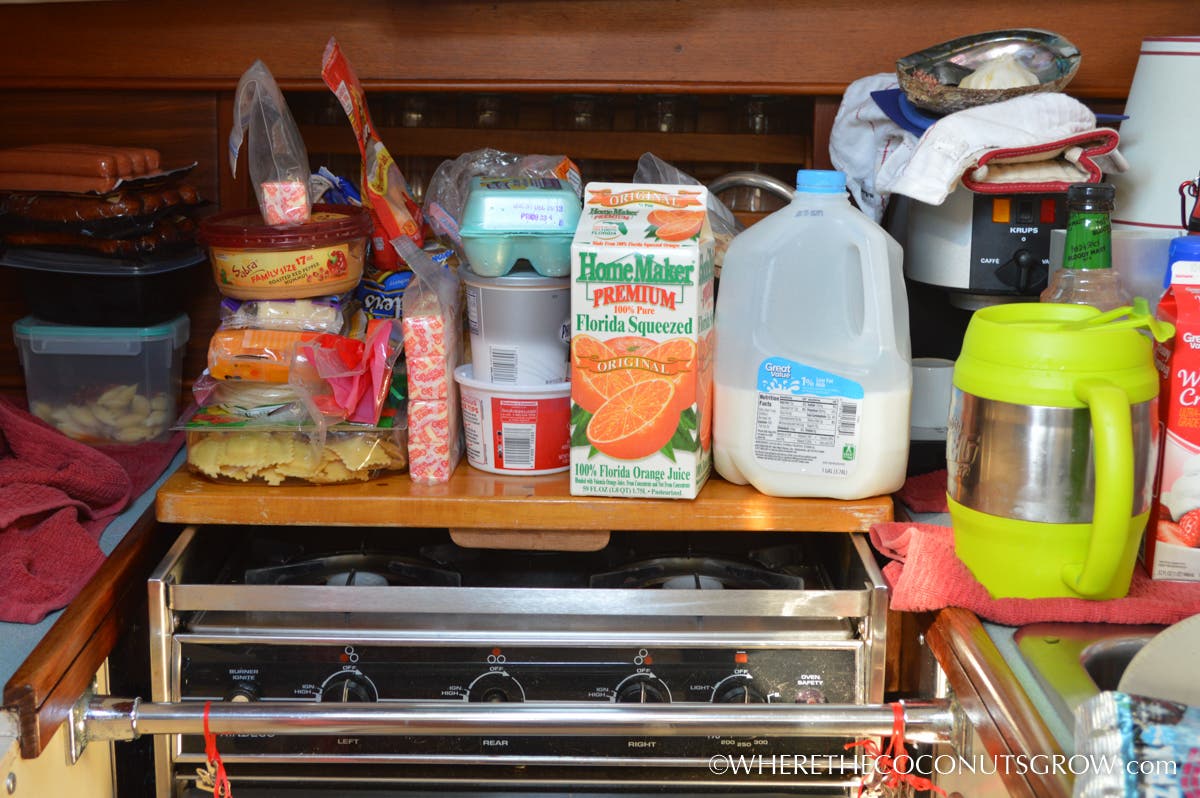
To defrost the unit, we have to take EVERYTHING out and squeeze it onto our tiny little countertops. Luckily I have a wooden board custom made to fit on top of the stove to gain a tiny bit more counter space.
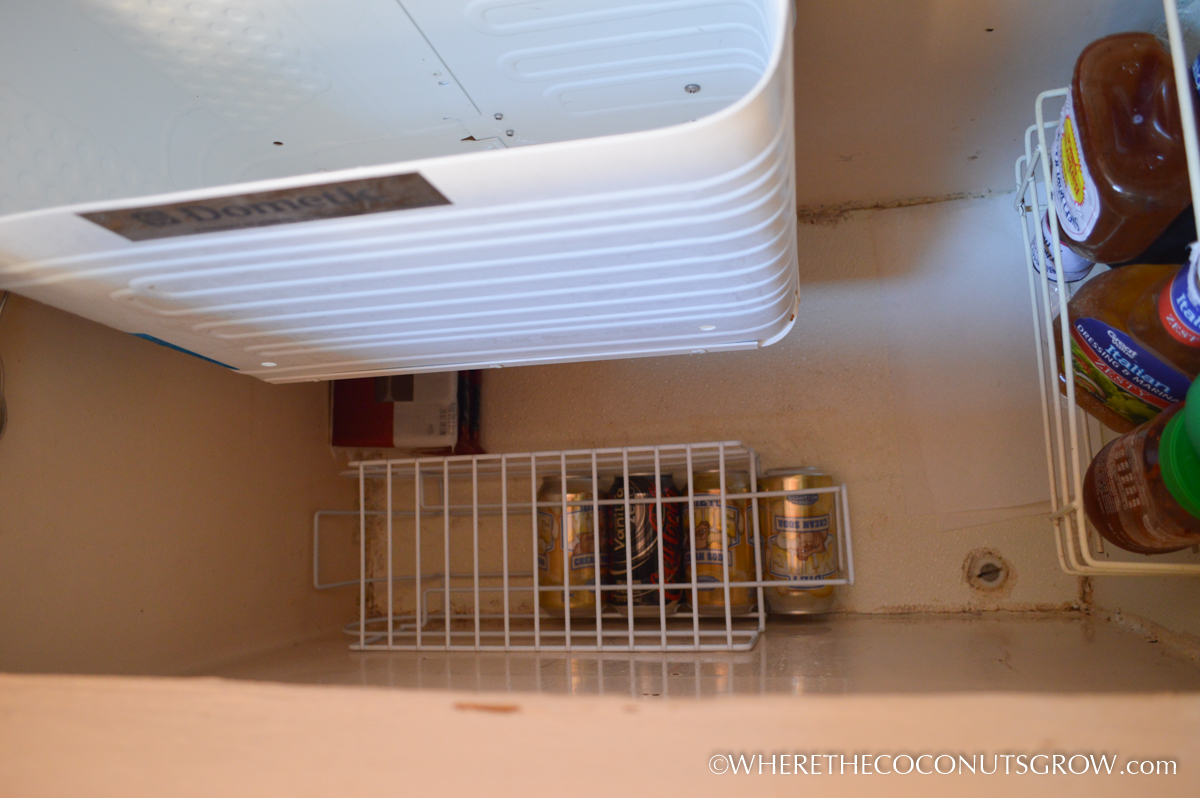
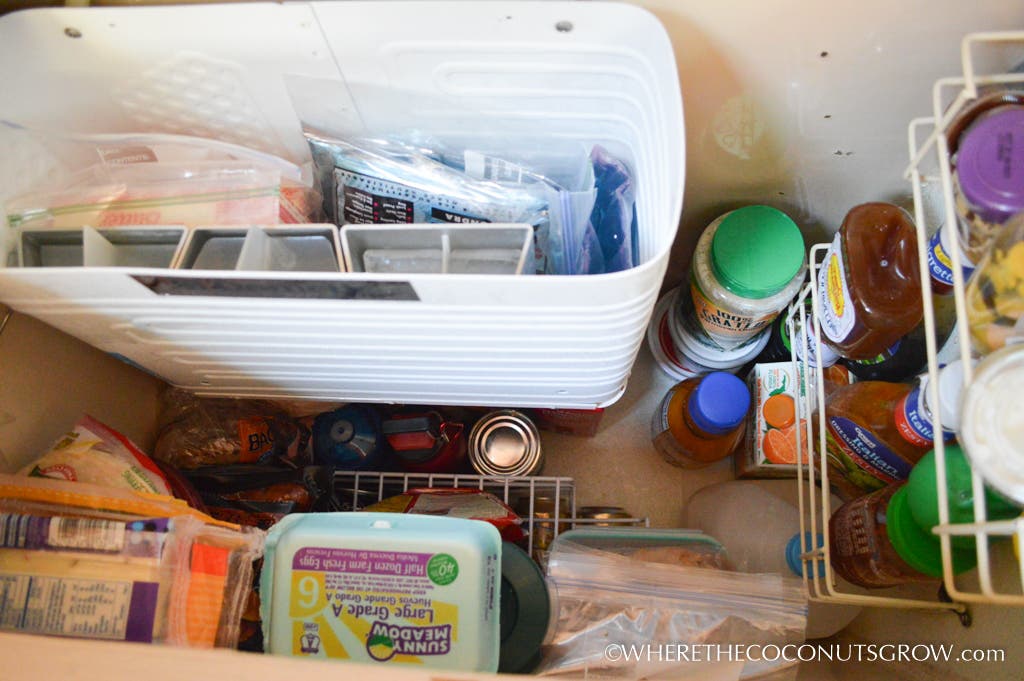
When it’s time to restock the fridge, I can barely reach the bottom. I have to just about climb in the fridge, hooking my feet up on the counter on the opposite side. I carefully put the least used items in the way back under the evaporator plate and I fill the $5 pop-can rack I found at Wal-mart. This rack is great for tiny fridge spaces. You load the cans on top and they roll down to the bottom. The top of the rack has a convenient shelf to continue stacking other food items on top of the pop cans without worrying about them toppling over.
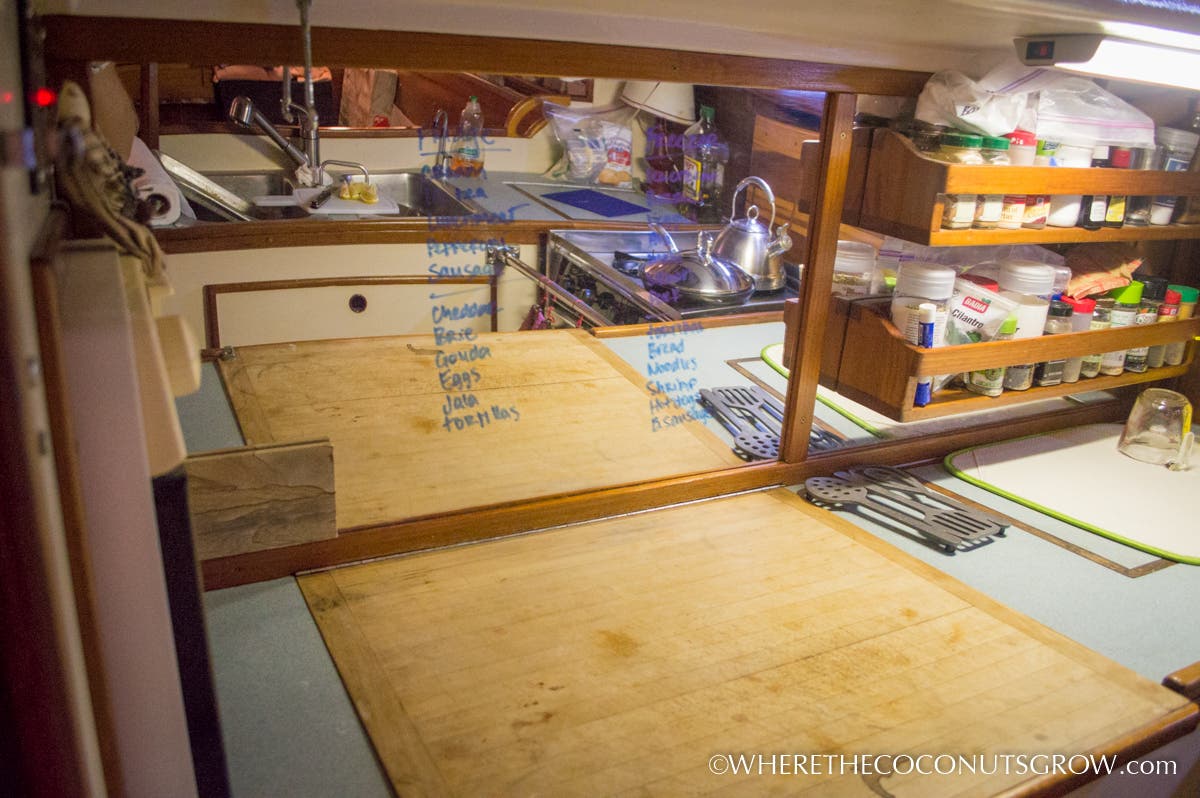
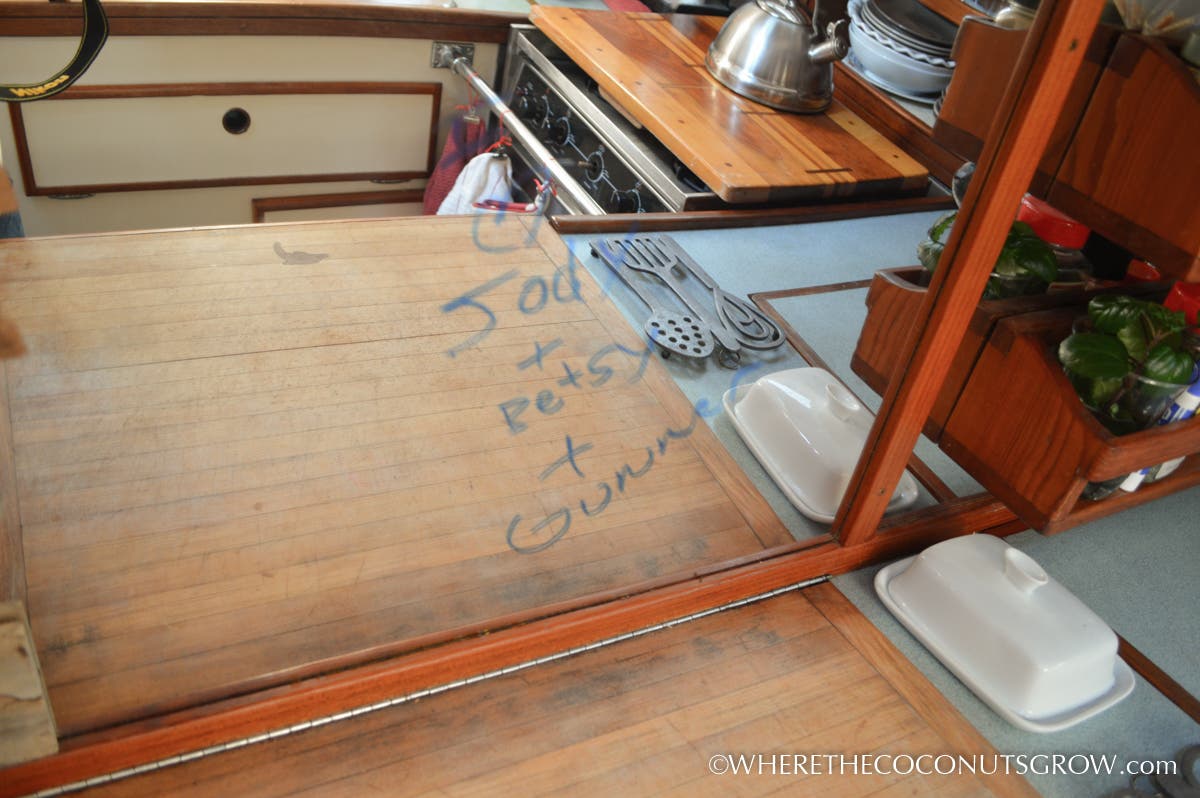
If you’ve ever seen a top-loading fridge in person, you know it’s near impossible to remember what is in there, and how much is left of each item when the fridge is stuffed to the brim after a big provisioning (shopping) day.
Not only does the mirror behind my fridge help make the entire galley look way bigger than it is, the mirror is also a convenient place to track what is in my refrigerator and freezer. I use a whiteboard marker to write, and I use windex and paper towels to erase. Easy peasy!
I like to group ingredients on the list by the way they are grouped or placed within the fridge/freezer, as well as sometimes writing down the quantity left. Knowing exactly what ingredients I have and exactly where they are inside my refrigerator and freezer, significantly cuts down on the time that they are left open, spilling out precious cold air.
My friend Brittany from www.windtraveler.net recently came over to visit my boat and she happened to notice ‘the writing on the wall’. She loved the idea so much, she went out to buy a dry erase board for her galley! After she shared it on Facebook, our mutual friend Carolyn of TheBoatGalley.com shared it on her site as well. If Carolyn and Brittany thought it was that brilliant, I figured I better share it with the tiny house community too!
I love efficiency and I love organization so you can imagine the pride I take in carefully packing a hundred items into a tiny top-loading fridge and being able to quickly access exactly what I need at any given time.
Added bonus: A mirror can even be the perfect place to leave love-notes 🙂
What are some tips you can recommend for refrigeration in tiny homes?
For more info about my life in a tiny floating home, follow me on Facebook!
By Jody Pountain for the [Tiny House Blog]
Does this run on solar alone? How many v does it use per day?
Adarsa, Yes, it’s a 12volt system and runs off of our house batteries. All of our systems are 12v and can run on solar and wind alone, provided that there is sufficient sun and wind. We currently have a total solar array of 700 watts plus a Four Winds II wind generator. Each refrigeration unit cycles at 3-4 amps. Cycling full time would be 100-amp hours per day, though average usage cycles 50% of the time, so each unit uses approximately 50-amp hours per day.
Our daughter worked on many schooners over a 10 year period, the Amistad being one. She learned many tips for living in a tiny space. One of the best was provisioning. They would pack the freezer by the day, starting with all the food for the last day being on the bottom of the freezer, and working their way to the top. They would divide the day’s food with pages of news paper. That way if someone other than the cook were to dig through the freezer they would know not to go below the paper. If I person wants to learn some organizational skills just live on a boat for a few years.
Judith, I love the newspaper trick, that’s a great idea! Thank you for sharing!!
You’re absolutely right, there’s no better way to learn how to organize than live on a boat with all the crazy shaped spaces scattered all over 🙂
In my camp cook days we lost power due to a faulty generator so I restacked the freezer in pretty much the same way, added a bunch of insulation around it and managed to get through without losing any food except for one bag of peas that ended up too far gone. It was summer too.
I have an old ColdMachine on my sailboat too. They are good small units. mine tends to freeze things even on low settings so they are good to have on hand.
Have you met anyone with a water-cooled unit? I understand that such units circulate water directly from the sea to the condenser. If you are familiar with them, are they more efficient?
Yes I believe we have talked to a few people that have a water-cooled system. I don’t believe they are more efficient, but I could be wrong. More underwater plumbing on a boat is never ideal.
hey folks, nice looking work, but—there’s always a but. i wish you had taken a page from cruising sailors who, because they are often far from base. There has been alot of debate and experimentation and engineering and the consensus is that 4 inches minimum of r-5 plus foam board surrounding a watertight, and airtight container-usually made of plywood, fiberglass and epoxy. there must be a drain, with a vapor lock loop and the top hatch should be stepped with double gasketing, a layer at each steps. the effort is well worth it, especially if you don’t want to run the compressor excessively.
fair winds all.