


Electricity is something we all take for granted. Power lines are strung from house to house, from every street corner, in every office. Rural communities, downtown hubs and all structures in between all have the ability to plug in and pay for individual power usage that is pulled from the grid.
What about tiny houses on wheels? What about tiny houses on the water? We are mobile and don’t often have a fixed placed to plug into at the end of the day. RV parks and marinas make it possible to hook up to power by using portable cables, but who really wants to be tied down like that? For many of us, the point in being mobile is that you don’t have to go to or be anywhere. We can travel and remain self sufficient.
Most mobile tiny homes (like sailboats) are powered from a generator or a set of 12-volt DC batteries that are run in series to make up what is called a house-bank. Larger vessels can run off of 24-volt systems. Batteries can provide power to a boat just like they would to a car. We charge them up and store the power to be used at a later time.
For such an important system, battery maintenance is by far one of the most important jobs there is on a boat. When we first bought our boat back in 2013, the batteries on board were about three years old. Two of our three batteries reside underneath the nav station seat and my bum was getting really toasty when I would sit down to use the computer. Heat was radiating up through the lid and cushion in a very noticeable way. The life of lead-acid 4D batteries is typically 2-3 years so we knew they were due to be replaced.
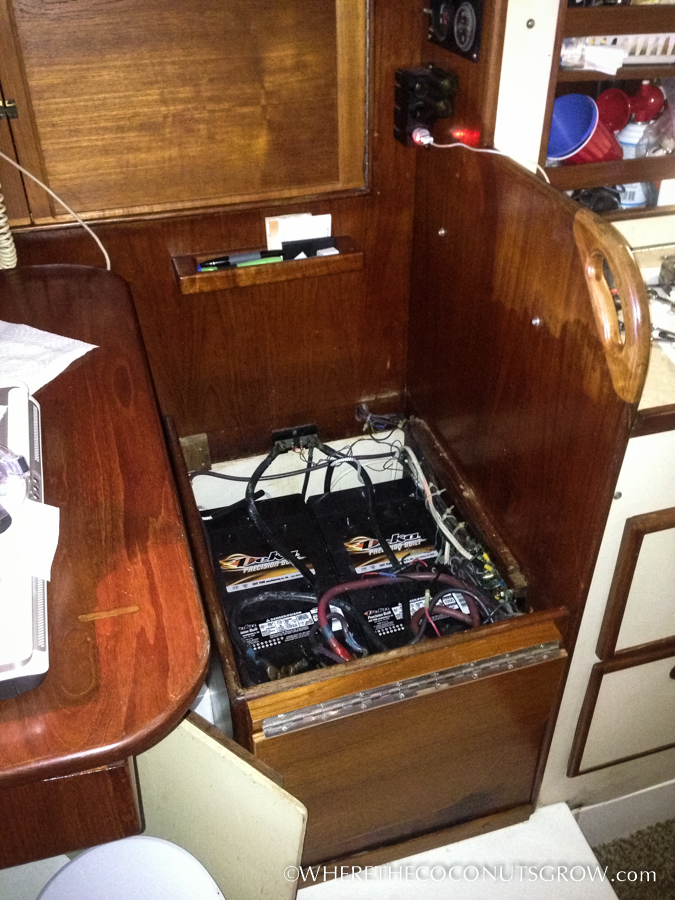
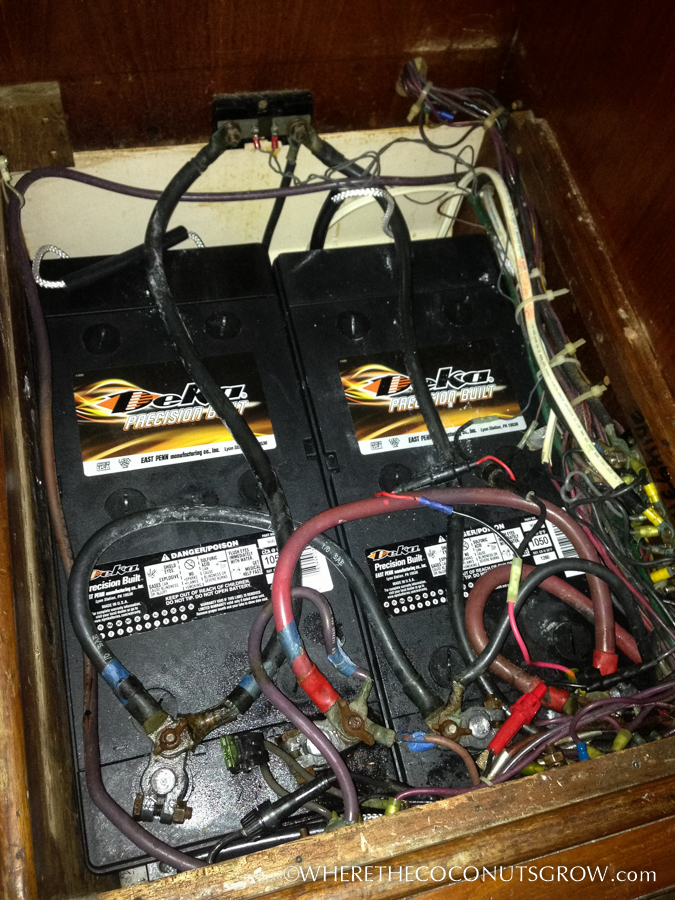
The first order of battery maintenance was to check all the connections. Yep, everything looks good and grounded. The bad news was that we knew immediately that we had a bigger issue. Checking the water level inside each of the battery cells confirmed they were very low. About 16oz of distilled water per cell was needed to bring them up to proper level, but they had already been too low for too long and cooked the battery so that they were still bubbling over, seeping out of the vents on the top of the batteries. While it’s not straight battery acid that was coming out, it’s still very corrosive and dangerous. You can see the spillage in the picture below. I was clearly more focused on the dangerous substance Peter was disposing of than I was on taking photos. We ordered replacement batteries right away.

We would have liked to put in 8D batteries to yield more amperage for a longer duration but the housing just wasn’t big enough and it’s not critical enough to rebuild the existing box or expand elsewhere. Our research discouraged us from the higher priced maintenance-free AGM batteries or gel-type batteries. The increased life wasn’t enough justification for the higher price, and we’ve also heard from many old salts that they don’t always have a longer life either. We don’t mind the additional maintenance of refilling the distilled water every couple of months, especially if it means saving a few hundred dollars on these lead-acid batteries. We chose to purchase Deka Lead Acid batteries for $220 each, times three. Plus, we were able to get them from the boat yard immediately adjacent to where our boat was when we bought her, the very next day. The guys that ran the yard even came to pick up the old batteries at our slip. What a deal!
The first step was to shut off all the power. No big deal, it’s just in the high 80’s outside and muggy as all hell on the West coast of Florida. We had only been living on the boat for a few weeks and we were still at the dock where there was no breeze. No power means no air conditioning…
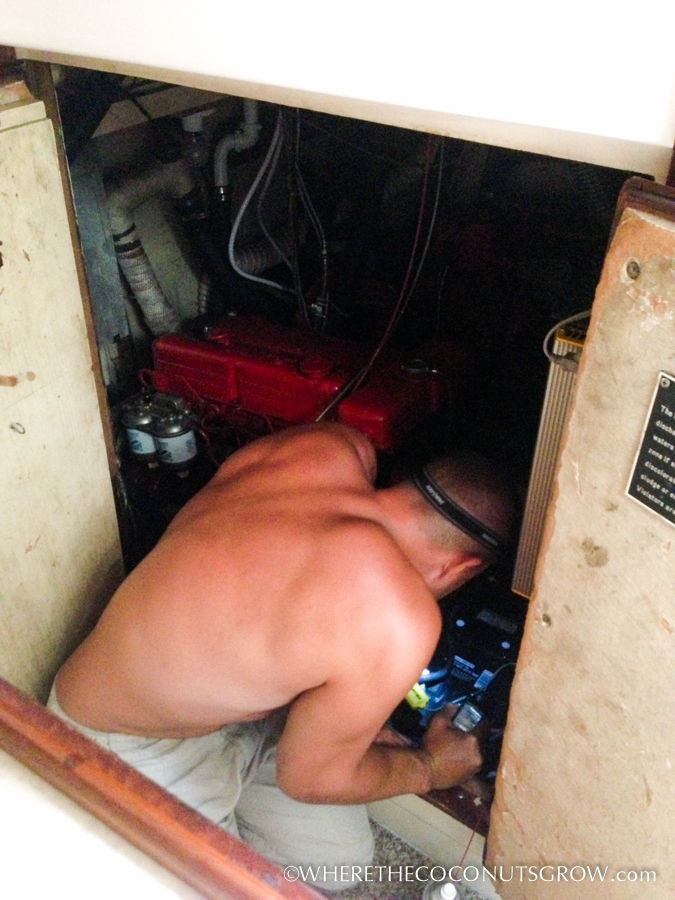
Peter put on his safety glasses and gloves, then used a little T-9 to loosen up the terminals and the first one was ready to come out. A whopping 80lbs of battery and seeping lead acid had to be lifted out of that hole without dripping anywhere. Peter and I got it onto a black trash bag, but there was NO WAY I could help him lift it up the vertical 5′ ladder and through our companionway into the cockpit or over the lifelines onto the dock. Easy access is a joke in our tiny floating home.
Our super nice neighbor Karl donated some sweat equity and came to the rescue. I was able to lift the first one out of the box with Peter, but not the second one. Karl comes back over to help us out again. Two men are stronger than one! Without his help I’m not sure we could have gotten those old batteries outside.
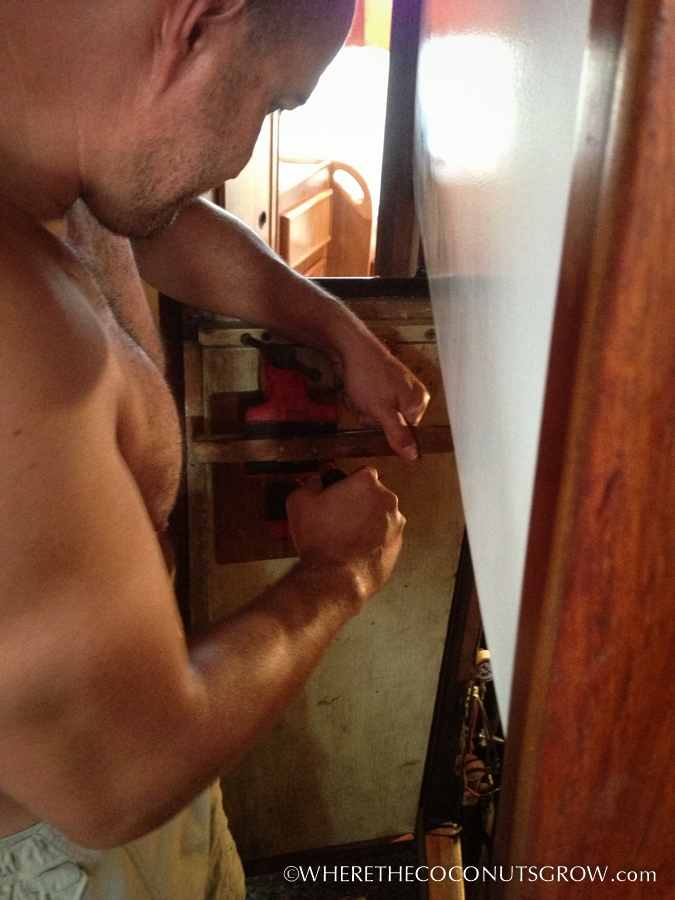
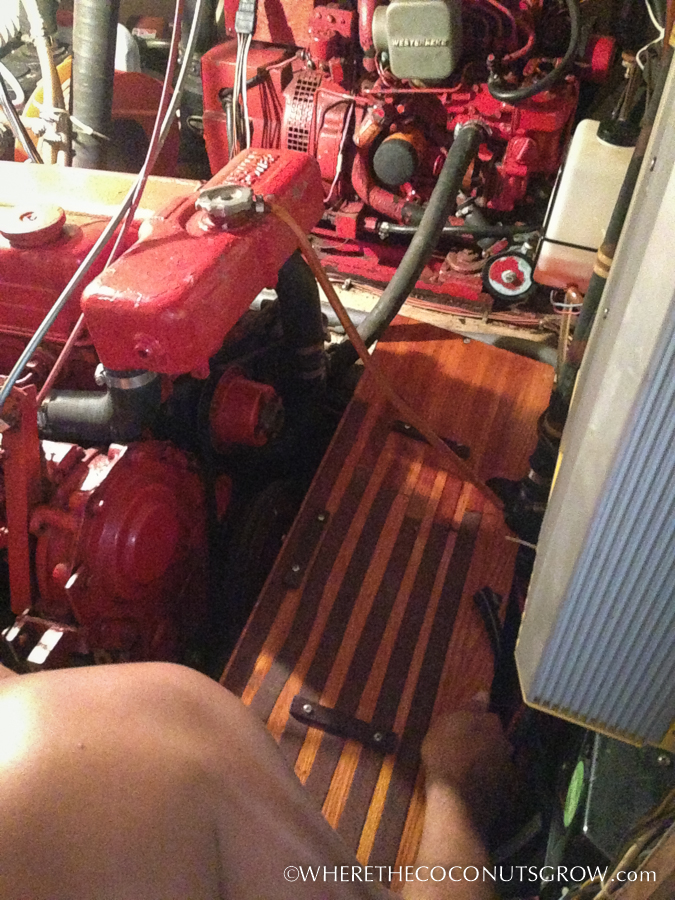
It’s not a real boat project unless you get sidetracked and start a new one before finishing the first one, right?? Don’t forget, at this point we still had NO POWER and NO air conditioning since we are only 1/3 done with the batteries. In order for the wood platform to screw back in properly over the top of the new batteries, we had to use the handy-dandy vice that was cleverly stowed on the back side of our engine room door. There was a small piece of wood that was beginning to split so we used some liquid nails and a screw to fix it up.
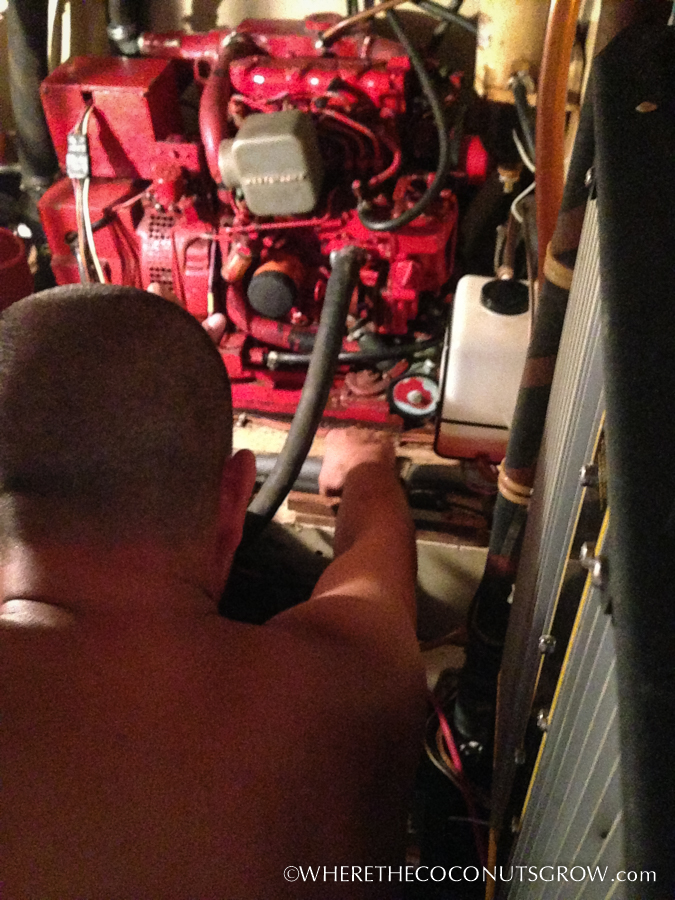
The third battery is in the engine room underneath a wooden board that our tool box is strapped to. The snap that holds the strap also busted off but that’s a little less critical so we added that one to the “list” for another day. On to finishing the batteries… Replacing the starter battery was much easier to get to.
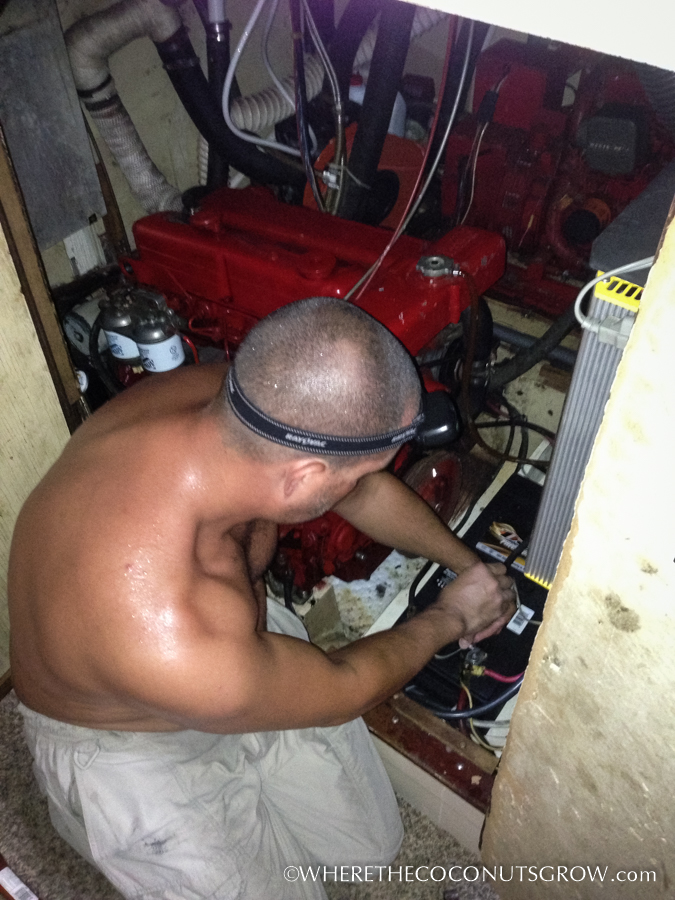
We were running out of daylight. It wasn’t getting any cooler and we were both sweating all over the place. We just needed to get them hooked back up properly and quickly. The headlamps were worn for the remainder of the project. Good thing we had little batteries to help us shine light on the big ones!!
Before lifting the new batteries in, we needed to clean out the box with baking soda and water to neutralize all the spillage. We’re not sure how long it had been like this, but there was an awful lot of corrosion and that’s never a good thing on a boat. Luckily the structural integrity of the box wasn’t affected and we didn’t need to rebuild anything… yet. Now totally dark, and still sweating, we tried to air out the fumes from the neutralization as best we could. We were determined to get this finished in one night so I mustered up all the strength and gumby-like leverage I had to help Peter drop them into place one at a time. After all the wires were put back together the right way and the terminals got a fresh coating of T-9, it was time to see if we had juice. Whew!! Everything seemed to be okay.
We were both so tired and on the verge of dehydration that when we plugged the shore power back in to get some air conditioning, we plugged them in the opposite locations. The fault warning was going off and it took us a few minutes to realize it had nothing to do with the connections for the new batteries, but that it could be the shore power cables. Peter went out to switch them and the beeping stopped. Finally! Light and cool air!!! The poor puppies had been waiting so patiently for dinner and potty time. We got the pups outside first, then back for their dinner and then we were finally able to head to the showers to get cleaned up.
The work wasn’t done yet… we still had to neutralize the acid that had leaked out and down onto the carpet. We sprinkled some more baking soda and let it do its work. There was more reaction than we were expecting, but it eventually got cleaned up. We eventually replaced that carpet anyway.
All in all, our first major boat project took longer than we anticipated but it was successful in the end. We’ve got another year at most left before we need to replace them again and it will hopefully take us half the time. We will be sure to start the process on a cool day and early in the morning 🙂
This project helped us truly appreciate the power we can supply on our boat. Now that we have long since sailed away from the dock and rely daily on the efficiency of our batteries to remain self-sufficient, never again will we take electricity for granted. Do you appreciate the electricity you use?
By Jody Pountain for the [Tiny House Blog]