Gwen Powers and her husband completed a Tiny House Workshop with Peter King, which she only knew existed because of the Tiny House Blog. Gwen says the workshop was excellent and has posted about it on her blog. She is letting me repost it here so more people will see how neat Peter’s workshops are.
Guest Post by Gwen Powers:
Back in October, some friends and I decided to head up to Vermont to participate in a Tiny House Workshop, run by Peter King (check out the website – and look for upcoming workshops – here).
I wrote an earlier, much shorter post on this right after the event, but I’m hoping to be able to give a more thorough report in this one. While this may not end up containing more information, memory being the finite thing that it is, it will definitely contain more pictures!
Photos by Gwen Powers, please contact her for permission to use them.
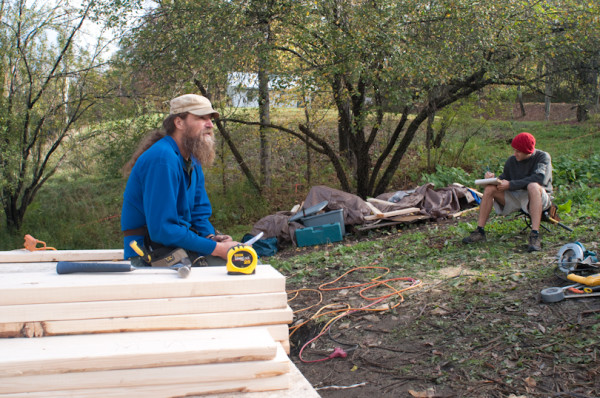
This is Peter King, giving us an intro talk about why he does these workshops. Peter feels strongly that building a place to live is not rocket science. Housing gets expensive and complicated when we decide we “need” extravagant amounts of space, and complicated structural and decorative details. But if we are willing to redefine that need, and pare it down a bit, than being intimately involved in building the most important structure in our lives is well within reach.
Peter claims – and I believe this, after the weekend – that anyone can learn how to build a simple structure. All it involves is basic math, and basic tools, and a few easily learned rules.
The second aspect of his involvement in these workshops is that he feels strongly that housing is just too darn expensive – we should be able to own the house and the land we live on, and not have to loan it from a big corporation.
After this discussion, and after getting a quick summary from each of us – eight participants, including the owner – on why we were there, we got to work.
The first task was framing out one of the walls. The building was 12 by 20, and the two long walls had to go up first. Khumpani (the owner, who is an herbalist who is currently living in an even smaller tiny house on the land) and Peter had finished the foundation earlier in the week, in spite of the miserably cold and persistent rain, so that we could get as much of the main structure done over the weekend.
This photo is just prior to getting the wall up – this is the most complicated tool used that day, and only Peter was allowed to use it:

And Peter in action:

And the first wall, going up!

Getting it level:

Then the rest went together relatively quickly. Unfortunately, the nail gun was not in use, as apparently these contraptions are picky about the types of nails that go into them, and we had the wrong kind. So instead we got to do lots of hitting of things! Which was fun, but much slower. When someone like Peter is sinking a nail, it takes him three hits. When rookies are sinking nails, it takes us anywhere from 8-20.
Also, we were learning about king, queen, and jack studs, as well as what cripples were and where they were supposed to go, so there was a lot of “Peter? Do we hit this one in here?” followed by pauses for measurements, re-measurements, and explanations.
Our progress near the end of the first day:
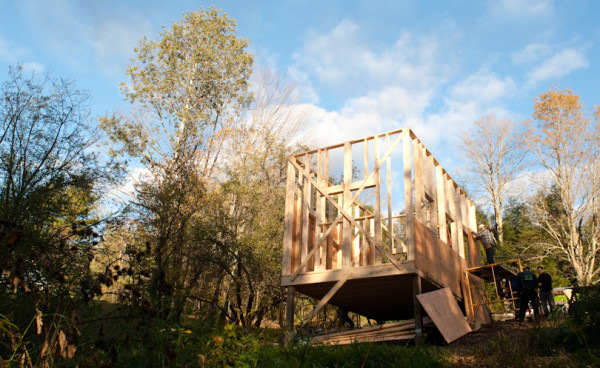

Cutting out windows:
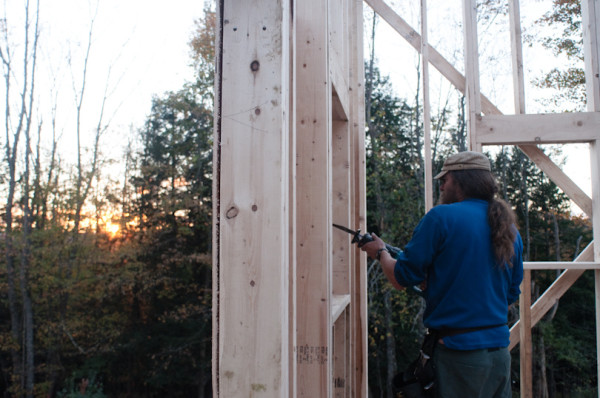
One of the tools we were allowed to use, a speed square:

The other tools we could use included hammers, and measuring tapes. And chisels. All simple hand tools, which did the majority of the work.
By the middle of the second day, the roof was going up:
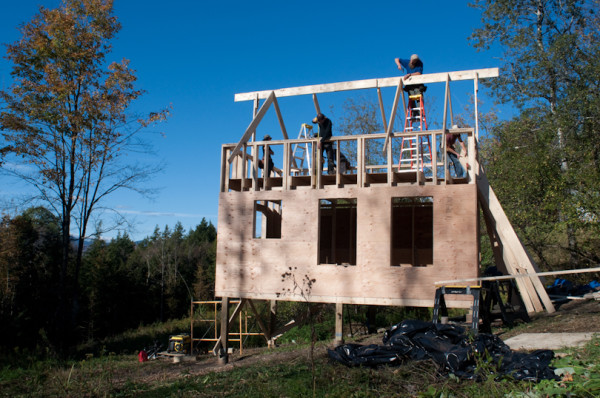
Some inside shots – this is from the entrance door, looking to the south. Khumpani planned for passive solar gain, which is why all the windows are on this side, and why they are enormous.
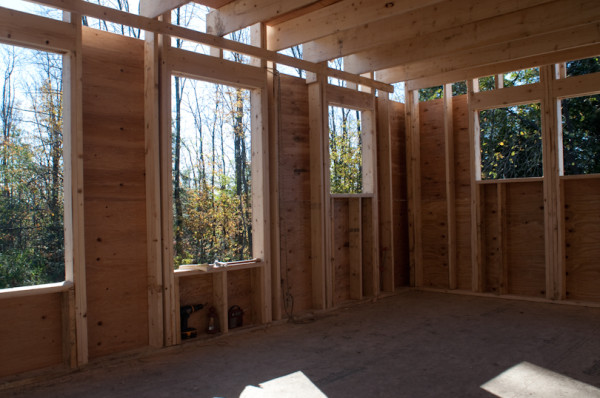
From the door, looking north – the kitchen will be going against the back wall, under the windows. The door that is framed out will eventually open to a deck.

From the kitchen windows (and the future deck) there’s a lovely view of the meadow where Khumpani is currently living, and the mountains beyond. See:

And one more inside shot, from the kitchen looking back:

The ladder over on the right goes up to the loft. He had planned for a dormer, to have another window and some headroom up there. I don’t know what it looks like inside at this point.
Here is what it looked like at the end of the second day – you can see the gap on the left where the dormer will be:

Peter’s ability to manage the project was remarkable. He was constantly juggling the roles of teaching and project management, and I thought he did a tremendous job. He somehow managed to keep track of all the little jobs that had to get done, kept everyone moving, paused to answer questions, and got a team of total novices to frame a house in two days. It was also fun to chat with him at meal times about his views on housing and lifestyle – he had really helpful things to say about finding land, books to read, and skills to acquire.
Overall, it was a fantastic way to spend a weekend, and we lucked out with a crew of lovely, thoughtful, interesting, fun and hard working people. It was also really great to meet and work with Khumpani, who is living his life with an inspiring level of dedication to his ideals and to the earth.
After we left, Khumpani continued to work on it on his own, with a little bit of help from friends and family, and I believe that Peter also returned to help him finish up the plywood sheeting, etc. Khumpani recently sent the participants an email with photos of the current progress – this is from the middle of November:

The inside is sheetrocked, and it’s almost ready to be moved into! I’m hoping to get updates as the inside gets finished. I think it will be a lovely space to live in.
Please be sure and check out Peter Kings website for more workshops. I will also try to stay in the know and let you here about them on the Tiny House Blog. Thanks Gwen for such a great report on a wonderful workshop. Visit Gwen’s blog here for more great reading.

I’d love to take one of Peter’s workshops. Great tiny house too. It really seems that this size is really more along the lines of what people need/want.
Looks absolutely sweet.
Did he talk at all about using posts like that in a cold environment and possible shifting due to frost?
Did the owner have to get permits?
What are owners plans far as plumbing, septic, compost toilet etc?
Hey Mike,
Thank you for your thoughtful questions. I have inserted my responses below.
-Khumpani
M:Did he talk at all about using posts like that in a cold environment and possible shifting due to frost?
KP: Yes, the 6×6″ pressure-treated posts are sitting on top of 10″ concrete Sonotubes that extend 6 feet down into the Earth. I went a full two feet below the frost line for added stability. I dug the 6 holes by hand and it was epic. Imagine kneeling down inside a 6 foot deep hole punching at the ground with a pry bar and scooping small bits of soil into a 5 gallon bucket with a garden trowel. Then you climb out of the holes with the bucket and dump it for the umpteenth time.
I also braced each post diagonally and horizontally (connecting post to floor and post to post) to add more structural integrity. Also, the concrete posts are two feet wide and bell shaped at the base. Eventually I’ll tie it all together by adding a pressure-treated plywood skirt around the bottom of the house.
M: Did the owner have to get permits?
KP: Yes, I got a permit from the town of East Montpelier to build a single-family house.
M: What are owners plans far as plumbing, septic, compost toilet etc?
KP: I have the downstairs sink plumbed out but it currently empties into a five gallon bucket. Next spring I plan to add a tub, sink, and flushing toilet upstairs. All this along with the kitchen sink will connect into a large pipe (stack) which will have to connect to a septic tank and leech field. This is the law in Vermont. I have engineers plans for the septic design. The plans were required for the building permit.
I plan to have a sawdust composting toilet that will be primary, especially in the warmer months when composting is easier. The flushing toilet will be used sparingly, just to keep the government-required system viable. I want to be able to divert the gray water away from the septic tank and into a small pond system that will filter and reuse nutrients. This will work in the warmer months, like April through mid- October.
Khumpani,
Thanks a lot for taking the time to answer all those. The place looks great, the size is perfect. I really like how you dug all the holes manually. You must have some sort of well there for your water source?
Would love to see interior pics down the road!
-Mike
I attended one of Peter’s workshops one year ago in May–it’s priceless, even if you just want to learn basics for building a woodshed or a privy, etc. I could swing a hammer, but had no framing skills whatsoever. Between the workshop, library books, and watching youtube videos, I’ve since built my own 10 x 14 house with an 8 x 10 loft, an 8 x 15 “shegrivy” (shed, greenhouse, privy…though the greenhouse has yet to be added to the southern side), and woodshed. I hope to complete my projects in the spring and get them posted to this blog!
It feels so impossible and entirely overwhelming at first, but if you just keep picking away at the education and ask lots of questions, things will start to click and you’ll end up figuring things out for yourself more often than not. (And being a chick and doing this project by myself, I get a fair amount of compliments and second head spins, which helps to perpetuate the motivation.) 😉
I live in Maine and built my house on pre-casted concrete piers; they’re essentially the same thing as sonotubes, but they’re precasted so you don’t have to mess with the concrete. They’re just heavy…having those “installed” was the only thing I contracted out for my process. After they were first installed, a month of heavy november rains had a few of them sinking, so my contractor came back (and didn’t charge) to have circular pads placed under each of the piers for a wider footing. The piers themselves–and sonotubes–can be placed far enough down so they’re below frost line, which helps tremendously in the prevention of lots of shifting and movement. For my shed, I just had two trucks of solid packing gravel and hand shoveled it for the base, spreading it over a scraped area that had no topsoil. I used a couple of logs and my car to pack it down, and then just used 4 x 4 pressure treated posts inside concrete Dekbloks (super cheap, precasted, you can lift them yourself!). This has been extraordinarily stable…though, I’ll see how it wears over the years!
I’m also happy to answer questions and provide input, but if you’re wanting the knowledge base and wanting to pursue any building projects but lack the experience, I cannot recommend Peter’s workshop enough! Totally. Empowering.
In terms of building permits, if you’re looking to buy property, local town codes are key to finding what you can and cannot do, or what will impose more financial stress for you. The town I’m building in requires a building permit for EVERYTHING, and I’m in shoreland zoning, which changes things a lot, too. I’m lucky though, however, because the town does allow “primitive septic designs” which can include composting toilets (like the simple urine diversion setup that I’ve implemented) and super cheap graywater treatment (just a sink drain from the kitchen…25 gallon/day, and I hope to tie in an outdoor shower).
I bought my property two years ago, 3.5 acres for $44,000 on a river (285ft frontage). I had enough saved to put 25% down, and have payments of $380/month. My property taxes were $187 for 2010. There’s no prepayment penalty on the sale, so I can fork as much over to the principal as I please. I’ve been saving and paying out of pocket to build the house and shed on the side, and this is on a salary of $31k. I aim to have the house completed well enough to rent 1 to 2 weeks each month, which will more than pay for itself, while I figure out if I want to return to school or purchase a small place closer to an urban setting. I plan to have everything paid for in 6 years. SO. GOOD!!!
Anyway, happy to share! This project looks GREAT!!! building in 4′ increments makes SO much sense, and I intend to have my next project be very comparable to this…love the dormer…
Lawn, your story is very inspiring! I hope you will share some photos with Kent so perhaps he can feature your house in a post of its own. That way it won’t get buried in the comments.
Cool, thanks for all of the info. Interesting about getting the posts below the frost line and putting in the circular pads for more stability. I like that concept. When I build my small house (in the Northeast) I am hoping to avoid a full foundation and this sounds like the way to go.
Thank you! Yes, I aim to make a full submission with video and details once I’m mostly completed. I’ve been on the email feed for this blog for about two years now and have been wholeheartedly inspired time and time again; I’m excited to share my own story some day next year.
Mike–mine have been installed through one winter with no change or frost heaving or shifting, and I’m pleased with the results. It’s mostly all about what your soil profile looks like, who does it, and what you’re willing to pay. I priced out the work with a few contractors and some of them came back to me and said they wouldn’t touch it because it was too small a project for them. Also, even if you want to do the work yourself, contractors will come out and walk the project for nothing to give you a cost estimate–ask them lots of questions and what they think is best, etc.; free advice is always welcomed, and then you could just go from there…
…And if you have a Habitat for Humanity Restore nearby, check it out; I salvaged all of my windows and doors from them and saved tons of mulah. I’m also learning how infinitely valuable an aluminum reflective/vapor barrier is; since you’re in a northern climate like me, wrap the entire inside of your house with it–it reflects the heat inward and holds it really, really well (only takes a stick of wood to heat the place). Even if your project is a few years down the road, don’t forget that insulation advice 😉
Also…
Another note on building permits: depending on the size of your project, you may want to review the differences between building a non-permanent vs permanent structure; some people can just ‘get away’ with building on concrete blocks or a couple of skids and not have to deal with the same responsibilities and/or fees associated with permanent structures. Because my town requires a permit to even park a camper on a lot, I went ahead and submitted plans for a permanent structure–and I’m glad I did, because ultimately it will only increase the value of my investment.
Concrete piers (In Sonotubes, perhaps) should sit on concrete footings. These footings might be 18-24″ or so in diameter depending on the soil and load. The depth of the footing depends on the frost line in your area. Code in Massachusetts calls for 48″ (Deep!). In eastern Maryland it’s only 24″.
One comment to Lawn: It’s dishonest, unethical and unkind to call a contractor to look at a project if you have no intention of hiring one. Make no mistake: “Free” estimates are not free for the contractor.
It’s true! My apologies…(my neighbor’s a contractor and offered the kind advice for nothing…so use the connections you have!) Some people will barter for a few logs from excavation. If you’re honest about it, some people are just happy to give the advice. Certainly, be sure to inform them that it’s a small project, because they’re are those who would just prefer to not touch it. Also, as a note to beginners, if you don’t know what you’re getting yourself into, oftentimes getting the project quoted out will let you know whether it’s worth the extra $$$ to have someone else do it vs doing it yourself and making the sweat equity investment–when I had my pier installation quoted out, I specifically requested the quotes and said I hadn’t made any decisions re: how I was going to have the project tackled. It’s definitely possible to get answers ethically–I didn’t mean to imply that it’s ok to invite people out for ‘free’ estimates. 😉 Thank you for clarifying!
I would love to see the inside. Please post it.
I really like this house! It’s big enough to really live in efficiently for a long time and it’s built well enough to last for ages. This shows how building a real home, especially in a cold climate, is serious business.
I like the idea of 2×6 framing 24″ o.c. But, the walls seem a bit overbuilt with lots of thermal bridging for such a small house. There is a trend nowadays to use more metal connectors and fewer studs at openings. This saves lumber up front and energy down the road.